Transforming a garage into a clean, durable, and attractive space starts from the ground up—and few upgrades compare to epoxy floor coatings. Beyond aesthetics, garage epoxy floors offer powerful resistance to stains, cracks, and wear, making them a favorite among homeowners who want more than just a place to park their car. But what exactly does the installation process look like?
Understanding the full process of garage floor epoxy installation helps you appreciate the craftsmanship involved and the importance of a professional touch. From preparing the surface to applying the final coat, each stage is critical to achieving a smooth, long-lasting finish.
Below is a detailed walkthrough of the process that professional installers like Gresham Concrete Coatings follow to deliver high-performance garage floors built to last.
Evaluating the Condition of the Concrete Surface
Every successful epoxy installation starts with a thorough assessment of the existing concrete slab. Not all concrete is created equal—age, cracks, stains, and moisture levels all affect how well the epoxy will bond.
Professionals begin by inspecting the garage floor for damage or structural issues. Cracks, spalling, or surface irregularities must be noted. A moisture test is typically conducted to ensure the slab is dry enough, as excess moisture trapped under epoxy can lead to bubbling or peeling.
This phase also includes determining whether previous coatings, sealants, or oils are present, which can interfere with adhesion. Surface contamination can reduce the epoxy’s effectiveness and longevity, making this step essential for a successful outcome.
Surface Preparation: Grinding and Cleaning
Once the surface condition is approved, the next—and arguably most important—step is preparation. This phase involves grinding the concrete using a diamond grinder or shot blaster to remove the top layer of the slab. This creates the proper surface profile or “tooth” needed for the epoxy to adhere effectively.
During this process, any existing sealers, paints, or residues are removed. It also opens up the pores of the concrete, allowing the epoxy to penetrate and bond deeply.
After grinding, the surface is meticulously cleaned. Dust, debris, and particles left behind from grinding are vacuumed and wiped down. At this point, any cracks or holes are repaired using specialized fillers designed to be compatible with epoxy systems. The goal is to create a smooth, uniform substrate ready for coating.
Applying the Epoxy Base Coat
With the surface now clean and properly profiled, the epoxy base coat is mixed and applied. This first layer serves as the foundation for the system, and it’s typically applied with rollers or squeegees, depending on the size and layout of the garage.
Installers must work quickly and evenly to avoid inconsistencies, since epoxy begins curing soon after it’s mixed. The base coat may include pigment to achieve the desired color, or it may serve as the bonding layer for decorative elements like flake or quartz.
This stage is where expertise matters most—an uneven coat, missed section, or air bubble can compromise the appearance and performance of the entire floor. Trained technicians ensure even distribution, edge coverage, and smooth blending throughout the surface.
Broadcasting Decorative Flakes (Optional)
For many homeowners, epoxy is more than just a practical upgrade—it’s an opportunity to personalize their space. After the base coat is applied, decorative flakes (also known as chips or flecks) can be broadcast across the surface.
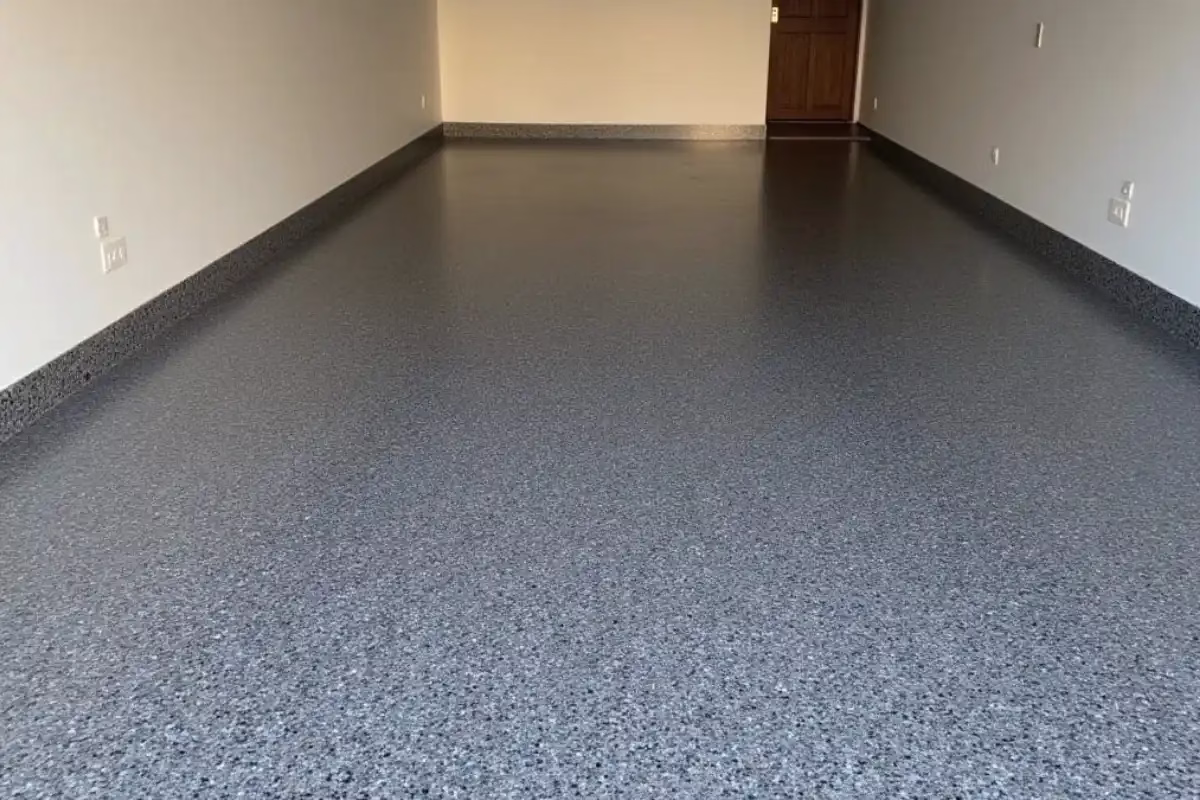
These flakes not only enhance the visual appeal by mimicking terrazzo or granite finishes, but they also add texture, which improves traction. The installer will evenly distribute the flakes by hand, ensuring full coverage and uniformity. Excess flakes are left to settle as the base coat cures.
After curing, any loose flakes are scraped and vacuumed away to leave a consistent, non-slip surface that’s ready for sealing.
Sealing with a Topcoat for Protection
The final step is the application of a clear, protective topcoat. This sealer locks in decorative flakes, enhances shine, and provides resistance to chemicals, abrasion, UV rays, and moisture. Polyaspartic or polyurethane topcoats are commonly used due to their rapid curing times and long-lasting durability.
This clear layer serves as a shield against oil spills, tire marks, road salts, and everyday wear and tear. It also gives the floor its signature glossy or satin finish.
Once applied, the floor is left to cure. Most garage epoxy floors are fully cured and ready for light foot traffic within 24–48 hours, and vehicle traffic after 72 hours—though this can vary based on environmental conditions and product specifications.
The Importance of Professional Installation
While DIY epoxy kits are available, they often lack the quality and precision of professional-grade systems. Improper preparation, misjudging moisture levels, or skipping steps can result in peeling, bubbling, and premature failure.
Gresham Concrete Coatings uses industrial-grade materials and a proven multi-step process to ensure a finish that not only looks great but also performs under the pressures of daily garage use. The result is a resilient, high-gloss surface designed to withstand the test of time.
Garage floor epoxy is more than a cosmetic improvement—it’s an investment in function, safety, and home value. Understanding the professional installation process reveals why precision and experience matter. From careful surface prep to the final protective topcoat, each step contributes to a long-lasting finish that elevates the entire space.
Whether you use your garage as a workshop, gym, or just a clean and stylish parking space, a properly installed epoxy floor makes a noticeable difference in performance and appearance.